Convertible Collector!
Andrea ClementsShare
The gorgeous Mr. YMC isn't a huge fan of vegetables and one of his least favourites is spinach! So I occasionally make ricotta and spinach cannelloni for him so he gets the goodness of the spinach without the taste! I always place a little bit of fresh dill in my ricotta and spinach mix, I find it adds a little something extra.
So I planted dill (and some other herbs) in some pots at our 'Happy Place' in Portarlington and I was super pleased to see that they were thriving after we hadn't been able to tend to them over the Victorian lockdown. Quite a few of them had gone to seed but there was a bounty of goodies to collect!
I headed down the stairs and out to the back yarn with my trusty scissors to cut some dill for Mr. YMC's cannelloni. On the way back in I noticed that I was doing a Hansel & Gretel.....I had a fine trail of dill following me into the house and up the stairs.
This would be fine if I needed to find my way back again but not so great otherwise! Now, many (or most) people would take a bag or basket or plate or something else to collect their herbs but not me, I decided I needed to make something useful.
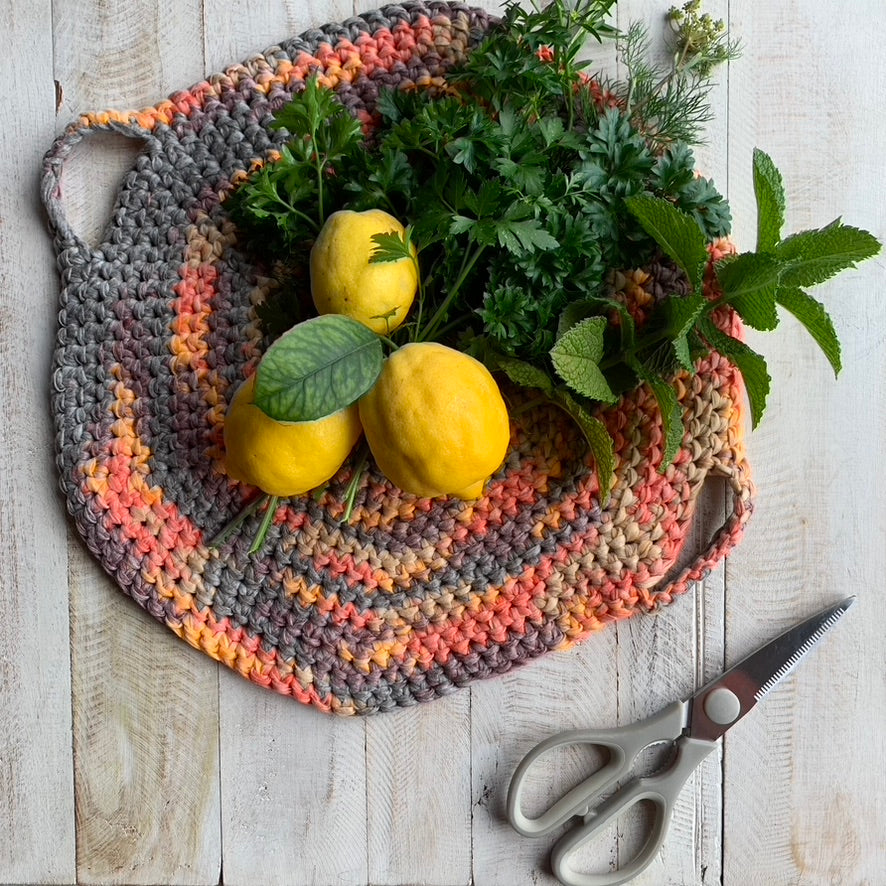
The thought behind the Convertible Collector is that it is not only great for collecting your fresh herbs, fruit etc. but it can also be used as a trivet for hot pots and even a placemat! I often bake individual cottage pies and thought that this would be brilliant to use to not only remove the dishes from the oven but also to place the dish on to protect the table. So it is very versatile and super quick and easy to make!

Materials Used/Required:
- 1 ball of Katia Washi Print (I used colour 300) you could substitute with Lion Brand Yarn Rewind or another tape yarn.
- 7mm crochet hook (I used a Clover Amour)
- Scissors
- Wool Needle for sewing in ends

Stitches Used
ch - chain
dc - double Crochet
ss - slip stitch
st - stitch

Rows 1-17 are worked in the round, do not join at the end of the round.
R1: 6 dc into a magic ring (6)
R2: 2 dc in every st. (12)
R3: 1 dc in the next st, 2 dc into the next st repeat till the end of the round. (18)
R4: 1 dc in the next 2 st, 2 dc into the next st repeat till the end of the round. (24)
R5: 1 dc in the next 3 st, 2 dc into the next st repeat till the end of the round. (30)
R6: 1 dc in the next 4 st, 2 dc into the next st repeat till the end of the round. (36)
R7: 1 dc in the next 5 st, 2 dc into the next st repeat till the end of the round. (42)
R8: 1 dc in the next 6 st, 2 dc into the next st repeat till the end of the round. (48)
R9: 1 dc in the next 7 st, 2 dc into the next st repeat till the end of the round. (54)
You'll notice that the shape doesn't appear completely round due to the increases. Don't worry it will sort itself out at the end!

R10: 1 dc in the next 8 st, 2 dc into the next st repeat till the end of the round. (60)
R11: 1 dc in the next 9 st, 2 dc into the next st repeat till the end of the round. (66)
R12: 1 dc in the next 10 st, 2 dc into the next st repeat till the end of the round. (72)
R13: 1 dc in the next 11 st, 2 dc into the next st repeat till the end of the round. (78)
R14: 1 dc in the next 12 st, 2 dc into the next st repeat till the end of the round. (84)
R15: 1 dc in the next 13 st, 2 dc into the next st repeat till the end of the round. (90)
R16: 1 dc in the next 14 st, 2 dc into the next st repeat till the end of the round. (96)
R17: 1 dc in the next 15 st, 2 dc into the next st repeat till the end of the round. (102)
Hint: for the next round I recommend loose chain stitches. If the chains are too tight it will make it difficult to double crochet into them in the final round.
R18: 1dc in the next 45 stitches. ch 10, skip 6 stitches. 1 dc in the next 45 stitches. Ch 10, skip 6 stitches.
R19: 1 dc in every stitch. Join with a ss to the first st and finish off.
Weave in ends.
Go and forage or collect! One of the benefits of the tape yarn and this design is that you can pop one of the handles into the other to hold everything in the collector and make it easier to transport your goodies!

You are welcome to share the pattern, however please acknowledge that the design belongs to Yarn Me Calm respecting my rights as a designer, thank you!
If you have questions about this pattern, please contact me at
I hope you enjoy the pattern!
Andrea x
