Myshelle Bag
Andrea ClementsMr. YMC and I (and the fur kids of course) have a place down at Portarlington, Victoria that we call our 'Happy Place'. It is a lovely house that is only one street back from the beach and has brilliant water views. Sitting on the balcony, looking at the view with a G & T (Teddy & The Fox from The Whiskery at Drysdale is one of my top local drops) and crocheting is one of my fave things! We get there whenever we can and our wonderful friends and family often join us there to enjoy it too!

About 12 months ago, (time flies during a lockdown!), we were at our happy place with our niece and nephew. We had gone for a lovely wander on the beach and the kids were busily collecting shells to bring back to the house to decorate some picture frames we had bought to keep them occupied! We had some crocheted shopping bags to bring the shells back with the plan to wash them in the outside sink and remove most of the sand before taking them inside! Because some of the shells were quite small we lost a couple on the way home and left a trail of sand (a bit like Hansel & Gretel) all the way home.
So it got me thinking there had to be a better way...
I wanted it to be eco friendly (not plastic), reusable and of course it had to look nice!

So I set about making the Myshelle Bag. I designed the initial version using Lion Brand Yarn ReUp and I planned to write up the pattern at the time however as often happens I got distracted!
At the time I designed this little bag I really had no idea what to call it so in the second iteration I asked some of the amazing creators on Instagram and Facebook for some ideas! The lovely Christine @misschiversstitches came up with Myshelle Bag and I love it! Thank you so much Christine!
The birth of the second (and current) version of Myshelle Bag came about when I saw a little video on Pinterest by shareapattern.com showing how to make this gorgeous cord! I grabbed some yummy Premier Home Cotton Multi and set about making this brilliant cord. I really had no idea what I was going to do with it initially but remembered the bag that I had made (and needed to write up) and thought it would be perfect for that.

So finally I got around to not only writing up the pattern, but I had a brand new and improved cord and a fabulous name for it! It took a little while but here is the free pattern for Myshelle Bag!
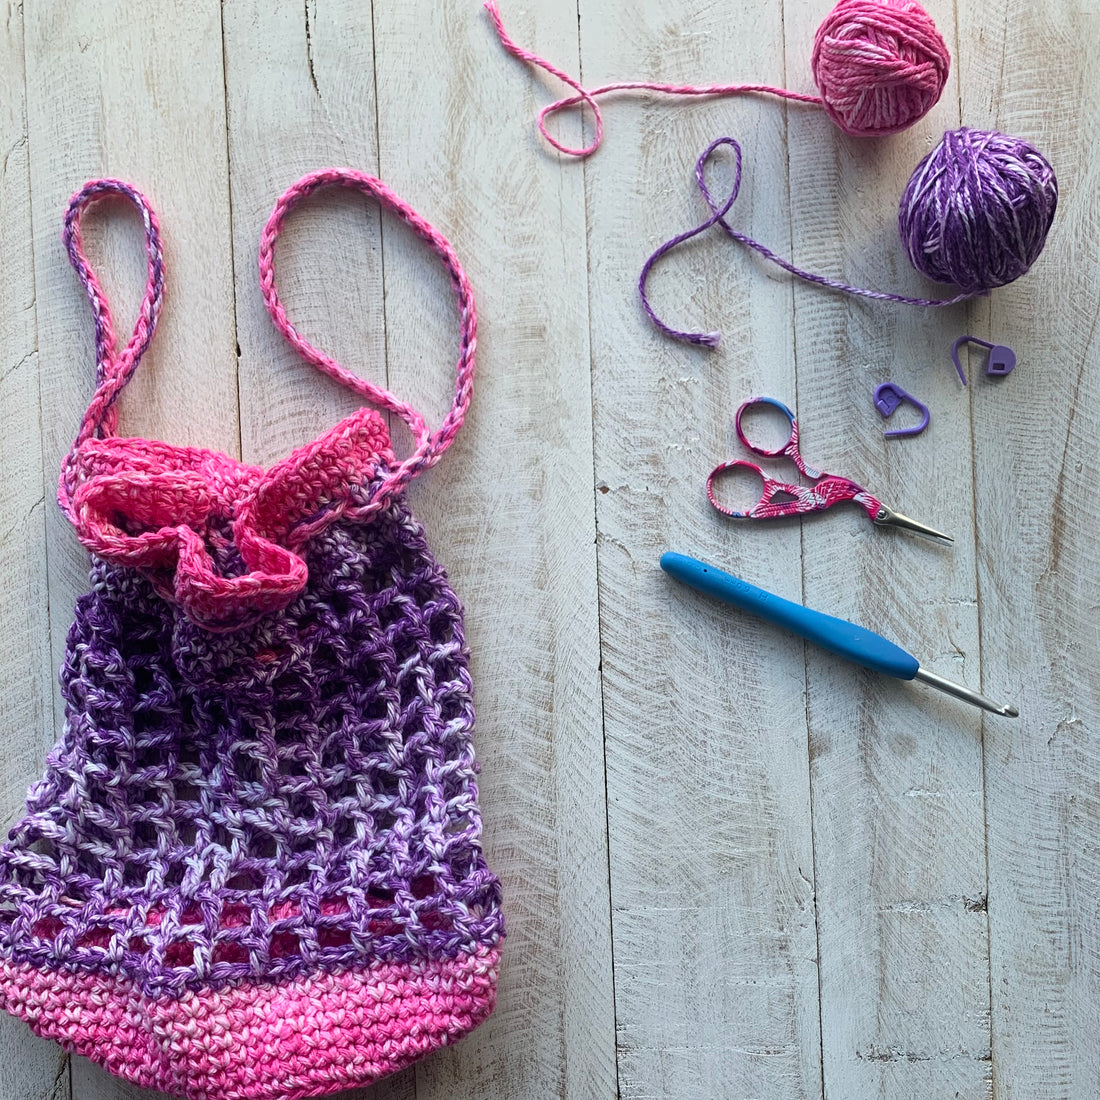
- Yarn, preferably in two - three different colours. I used Lion Brand ReUp in the first version and Premier Home Cotton Multi in the second. I used almost two balls of Premier Home Cotton Multi.
- Yarn/wool needle (for weaving in the ends)
- Stitch markers
- Scissors
- Crochet hook - I used a 6mm Clover Amour for the cord and a 5mm Clover Amour for the bag.
- dc double crochet
- blo back loop only
- ch chain
- st stitch
- slst slip stitch
- tr treble
The Cord:
There is a little video below to help understand how to make the cord. It is a little bit fiddly to start with but works up quickly and is a brilliant little addition to your crochet toolbox!
- Using both yarns together create a loop on your hook.
- *Using colour 1, yarn over front to back, using colour 2 yarn over back to front and pull through all loops on hook. You should have one loop on your hook in colour 2*. Repeat from * to * until cord reaches approximately 1.5m.
The Bag:
UK terms used throughout.
The base:
Using colour 1
Rows 1-17 are worked in the round, do not join at the end of the round.
R1: 6 dc into a magic ring (6)
R2: 2 dc in every st. (12)
R3: 1 dc in the next st, 2 dc into the next st repeat till the end of the round. (18)
R4: 1 dc in the next 2 st, 2 dc into the next st repeat till the end of the round. (24)
R5: 1 dc in the next 3 st, 2 dc into the next st repeat till the end of the round. (30)
R6: 1 dc in the next 4 st, 2 dc into the next st repeat till the end of the round. (36)
R7: 1 dc in the next 5 st, 2 dc into the next st repeat till the end of the round. (42)
R8: 1 dc in the next 6 st, 2 dc into the next st repeat till the end of the round. (48)
R9: 1 dc in the next 7 st, 2 dc into the next st repeat till the end of the round. (54)
R10: 1 dc in the next 8 st, 2 dc into the next st repeat till the end of the round. (60)
R11: 1 dc in the next 9 st, 2 dc into the next st repeat till the end of the round. (66)
R12: 1 dc in the next 10 st, 2 dc into the next st repeat till the end of the round. (72)
If using 3 colours, change to colour 2.
R13: 1 blo dc in each st (72)
R14-18: 1 dc in each st (72)
Change to colour 2 (or colour 3 if you are using three colours).
R19: 1 dc in each st (72)

The Sides:
UK terms used throughout.
R20 - R29: Ch 5 & place marker in third chain from the hook (counts as 1tr & 2ch), sk 2 st, 1 tr in next stitch.
Ch 2, sk 2 ch, 1 tr in next stitch. Repeat for remainder of row joining with a slst to the chain with the marker.
The Top:
UK terms used throughout.
R30: Ch 1, 2 dc in each space, 1dc in each tr join with slst.
R31: Ch 1, 1 dc in each stitch. Join with a slst.
R32: Ch 1, 1 dc in each stitch. Join with a slst.
R33: Ch 2, sk 1 st, 1. Ch1, 1 dc join with slst.
Change to colour 1.
R34: Ch 1, 1 dc in each space, 1dc in each dc join with slst.
R35: Ch 1, 1 dc in each stitch. Join with a slst.
R36: Ch 1, 1 dc in each stitch. Join with a slst.
R37: Ch 1, 1 dc in each stitch. Join with a slst.
Fasten off and weave in ends.
Starting on the inside of your bag, weave your cord through the 1 chain spaces in row 34. I wove through one space then skipped two chain spaces.

I then repeated this on the inside of the bag in the gap created by weaving through the spaces on the outside of the bag (see pictures). I tied a knot in my cord and left this on the inside of Myshelle Bag.

Take two external loops at opposite ends of your Myshelle Bag and pull on these. That will create the drawstring loops and the handles for your Myshelle Bag.

Your Myshelle Bag is finished!

You are welcome to share the pattern, however please acknowledge that the design belongs to Yarn Me Calm respecting my rights as a designer, thank you!

If you have questions about this pattern, please contact me at
I hope you enjoy the pattern!
Andrea x