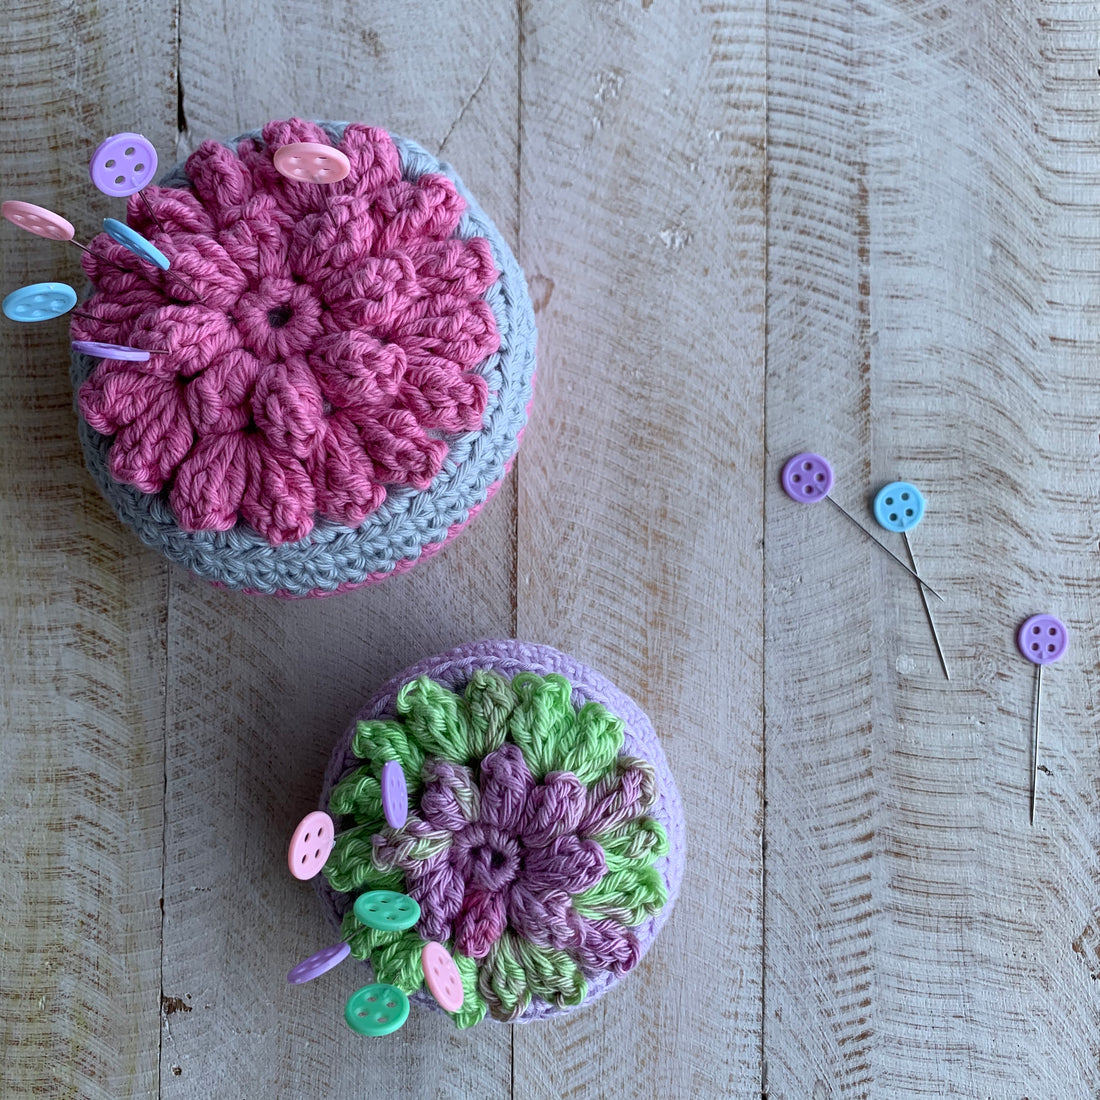
2. Do a beginning popcorn in the first double crochet (see video or beginning popcorn description for help).
Chain 2, popcorn in the next stitch - continue to the end of the round and finish with a slip stitch into the top of the first popcorn.
Chain 3, do 4 treble into the same space. Remove the hook from the stitch and pull up the loop slightly. Insert the hook in the top of the starting chain 3, pick up the loop that you pulled up earlier and pull through.
3. Slip stitch into the next chain space.
Do a beginning popcorn stitch into the chain space.
Chain 2 and popcorn stitch into the same space, repeat until the end of the round (you should have 2 popcorn stitches and 2 chains in between each popcorn with a total of 16 popcorns).
Fasten off and join your second colour with a slip stitch into any of the chain spaces.
4. Chain 1, 2 double crochet in the same space.
1 double crochet into the top of the popcorn stitch.
Repeat 2 double crochet in each space and 1 double crochet in the top of the popcorn stitch until the end of the round.
Join with a slip stitch to the fist double crochet (not the chain 1).
5. This round is worked in the back loops only (see picture).
Chain 1 (does not count as a stitch).
Back loop double crochet into each stitch around.
Join with a slip stitch to the first double crochet (not the first chain).
6. Chain 1, double crochet in every stitch around and doing with a slip stitch to the starting stitch (not the first chain).
7. Repeat previous round.
8. Repeat previous round.
9. Repeat previous round.
10. This round is worked in the back loops only.
Chain 1 (does not count as a stitch).
Back loop double crochet into each stitch around.
Join with a slip stitch to the first double crochet (not the first chain).
The next rounds are completed continuously so a stitch marker comes in handy here!
11. Double crochet 2 together (place a stitch marker in this stitch), 4 double crochet. Repeat this around.
I generally use one of two different techniques to decrease. Both involve crocheting 2 stitches together however one of the techniques only uses the front loop. For this particular pattern I have used the technique that uses both of the loops.
To double crochet 2 together:
- insert hook into the first stitch and pull up a loop, do not finish the stitch - you should have 2 loops on the hook,
- then insert hook into the next stitch and pull up a loop, you should have 3 stitches on the hook.
- yarn over and pull through all 3 stitches.
12. Double crochet 2 together (place a stitch marker in this stitch), 3 double crochet. Repeat this around.
13. Double crochet 2 together (place a stitch marker in this stitch), 2 double crochet. Repeat this around.
14. Using toy stuffing, stuff firmly (be careful not to over-stuff as you don't want to create 'holes' in your work).
15. Double crochet 2 together (place a stitch marker in this stitch), 1 double crochet. Repeat this around.
16. Double crochet 2 together (place a stitch marker in this stitch). Repeat this around.
17. Double crochet 2 together (place a stitch marker in this stitch). Repeat this around.
18. Fasten off leaving a long tail.
Using your yarn/wool needle weave in and out of the last stitches and pull tight to close the hole. Fasten off and weave in the ends.
Your Pop & Pin Cushion is all finished!
You are welcome to share the pattern, however please acknowledge that the design belongs to Yarn Me Calm.
Please respect my rights as a designer, thank you!
Tag your make on Instagram #popandpincushion
If you have questions about this pattern, please contact me at
andrea@yarnmecalm.com.au
I hope you enjoy the pattern!
Andrea x


