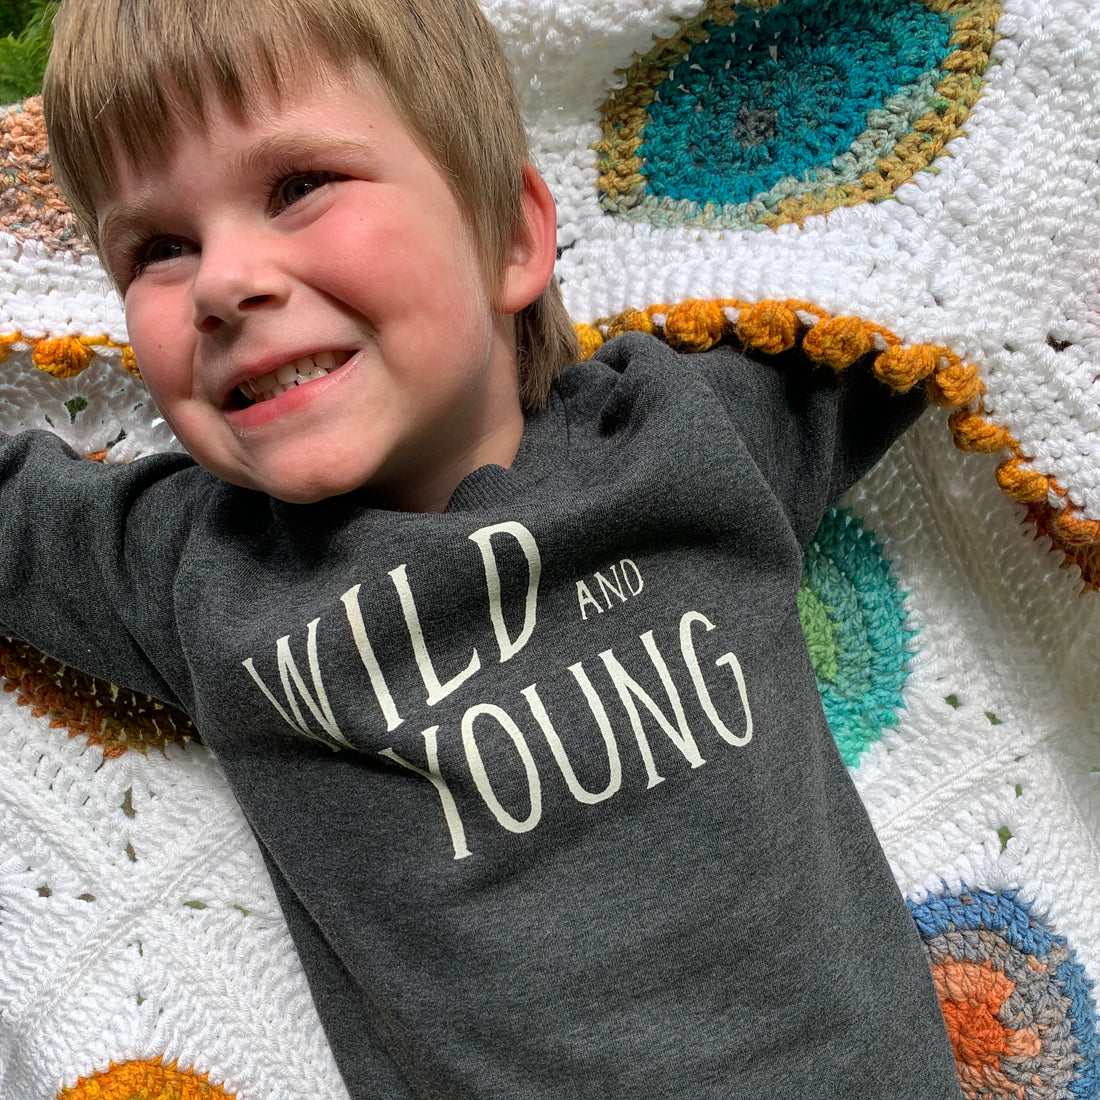
Soooo one of my gorgeous nephews (we will call him Little L for now) recently asked me to make him a 'blankie'.
Apparently I was failing miserably as an auntie (my words not his!) because I made his big sister a blanket and I didn't make him one and she wouldn't let him have it. He is such a super cute little munchkin and asked me so nicely what could I say?
Little L asked me to not only make him a blankie, he asked for rainbow colours. And because I adore my nieces and nephews and lets' be honest, they run circles around me and have me wrapped around their little fingers, I of course went hunting for the 'right' blankie for him.
All I had in my mind initially was that I wanted to have a pom pom border like I used on one of my recent blankets so it was lovely and tactile but that was as far as I had gotten.
Then I remember several years ago seeing a blanket made with circles inside squares and thought how gorgeous that would look with pom pom border.
So I had the squares & border sorted, now just to choose the yarn...
I decided to use some yummy Premier Yarns Colorfusion for the 'Rainbow' element of the blanket so I could:
1. have a play with the yarn
2. use different colours
3. not have to change yarns unnecessarily therefore minimising ends to weave somewhat
4. All of the above
![]()
And I thought I would use Fiddlesticks Superb Big in white to square up my circles and join them all together. The reason for this was that I wanted the colours in the Premier Yarns Colorfusion to really pop and I thought the contrast would work well!
Squircles
I set about making a circle in a square! As you all know, there are soooo many versions of this available in books, online, patterns etc. this is just my version! I took me a couple of tries to get the shape right but I was rapt with the end result!
UK terms used throughout.
What you'll need:
10 balls of Fiddlesticks Superb Big
6 balls of Premier Yarns Colorfusion
Scissors
Wool needle for weaving in ends
Stitch marker
6mm Hook
I deliberately used a smaller hook as I wanted the blankie quite 'dense' so it would almost be a weighted blankie. You could absolutely use a larger hook, up to a size 8mm would work beautifully however this will impact on the yarn quantities.
Stitches Used & abbreviations:
UK terms used throughout.
ss - slip stitch
ch - chain
dc - double crochet
htr - half treble
tr - treble crochet
hdtr - half double treble
dtr - double treble

Round 1:
- Ch 4 and place a stitch marker in the last chain completed.
- 11 tr into the 1st chain.
- Join with a ss to the stitch with the marker. (12)
Round 2:
- Ch 3 and place a stitch marker in the last chain completed.
- 1 tr in the same stitch as the ch 3.
- 2 tr in the next 11 stitches.
- Join with a ss to the stitch with the marker. (24)
Round 3:
- Ch 3 and place a stitch marker in the last chain completed.
- 1 tr in the same stitch as the ch 3.
- 1 tr in the next stitch, 2 tr in the next stitch. Repeat 10 times.
- 1 tr in the next stitch.
- Join with a ss to the stitch with the marker. (36)
Round 4:
- Ch 3 and place a stitch marker in the last chain completed.
- 1 tr in the same stitch as the ch 3.
- 1 tr in the next 2 stitches, 2 tr in the next stitch. Repeat 10 times.
- 1 tr in the next 2 stitches.
- Join with a ss to the stitch with the marker. (48)
- Cut yarn and weave in ends.
I made a total of 25 circles in different colours of Colorfusion (Springtime, Autumn Sky, Tropical, Painted Desert & Wildflower).

Now for the squaring up!!!
I joined the Fiddlesticks Superb Big to the circle with a slip stitch.
Round 5:
- Ch 4 and place a stitch marker in the last chain completed.
- 1 hdtr in the same stitch as the ch 3.
- 1 tr in the next 2 stitches
- 1 htr in the next 2 stitches
- 1 dc in the next 3 stitches
- 1 htr in the next 2 stitches
- 1 tr in the next 2 stitches
- 1 hdtr, 1 dbtr, ch 2, 1 dbtr, 1 hdtr in the next stitch. (This creates the first corner!)
- 1 tr in the next 2 stitches
- 1 htr in the next 2 stitches
- 1 dc in the next 3 stitches
- 1 htr in the next 2 stitches
- 1 tr in the next 2 stitches
- 1 hdtr, 1 dbtr, ch 2, 1 dbtr, 1 hdtr in the next stitch. (This creates the second corner!)
- 1 tr in the next 2 stitches
- 1 htr in the next 2 stitches
- 1 dc in the next 3 stitches
- 1 htr in the next 2 stitches
- 1 tr in the next 2 stitches
- 1 hdtr, 1 dbtr, ch 2, 1 dbtr, 1 hdtr in the next stitch. (This creates the third corner!)
- 1 tr in the next 2 stitches
- 1 htr in the next 2 stitches
- 1 dc in the next 3 stitches
- 1 htr in the next 2 stitches
- 1 tr in the next 2 stitches
- 1 hdtr, 1 dbtr, in the next stitch (with the stitch marker, this finishes the fourth corner!)
- ch 2 and join with a ss to the stitch with the marker.
Round 6:
- Ch 3 and place a stitch marker in the last chain completed (counts as 1 tr)
- 1 tr in the next 14 stitches
- 2 tr, ch 2, 2 tr in the corner space.
- 1 tr in the next 15 stitches.
- 2 tr, ch 2, 2 tr in the corner space.
- 1 tr in the next 15 stitches.
- 2 tr, ch 2, 2 tr in the corner space.
- 1 tr in the next 15 stitches.
- 2 tr, ch 2, 2 tr in the corner space.
- Join with a ss to the stitch with the marker.
Round 7:
- Ch 1 and place a stitch marker (counts as 1 dc)
- 1 dc in the next 16 stitches,
- 1 dc, ch 2, 1 dc in the corner space.
- 1 dc in the next 19 stitches,
- 1 dc, ch 2, 1 dc in the corner space.
- 1 dc in the next 19 stitches,
- 1 dc, ch 2, 1 dc in the corner space.
- 1 dc in the next 19 stitches,
- 1 dc, ch 2, 1 dc in the corner space.
- 1 dc in the next 2 stitches.
- Join with a ss to the stitch with the marker.
- Cut yarn and weave in ends.

Once I had finished my 25 circles and squared them up it was time to decide on a joining method. I really wanted to join my squircles (yep that is what I am calling them) with a method I hadn't used before. So back to the research...

I came across the most phenomenal join called the 'completely flat zipper method' by Dedri Uys of Look at What I made. It is such a beautiful join that sits completely flat as the name promises. It is also lovely and neat and looks great not just on the front but on the back too.
Click on the picture below to go to the Look at What I Made website.
This is a picture of the back of the zipper join and how lovely and tidy it looks!

So now all my beautiful squares have been joined and its time for the border! I love my little variation on the pom pom border it is super cute (I think so anyway!) and safer for little fingers as it doesn't have large gaps for them to get their fingers stuck in! It is also such a beautifully tactile stitch and I often find myself playing with the little pom poms absentmindedly!
Pom Pom border.

In order to prepare for the pom pom border I did a round of double crochet into each stitch around the blanket with 1 dc, 2 ch, 1 dc in the corner.
I have a written pattern here for those who prefer it but have also done a quick little video on how to do make the pom pom border for those visual makers!
Please note that when adding the border to your Running Circles around my Auntie Blanket that the number of stitches on the joined squares does not equal up completely to the number of stitches required for the pom pom border. You will have one or two stitches out at each end as you get close to the border. Don't worry about this at all it makes no difference to the completed border. I just add or subtract a stitch (whatever is necessary) at the corner when I do this border and it looks great.
Stitches Used & abbreviations:
UK terms used throughout.
ss - slip stitch
ch - chain
tr - treble crochet
- Starting in the corner of your blanket join with a ss, ch 1, ss all into the corner.
- ss in the next stitch.
- ss in the next stitch. Ch 3 into the same stitch as the slip stitch.
- Yarn over, insert hook into the same space as the slip stitch, yarn over, pull through, yarn over and pull through 2 loops on the hook (you should have 2 loops on your hook).
- Yarn over, insert hook into the same space as the slip stitch, yarn over, pull through, yarn over and pull through 2 loops on the hook (you should have 3 loops on your hook)
- Yarn over, insert hook into the same space as the slip stitch, yarn over, pull through, yarn over and pull through 2 loops on the hook (you should have 4 loops on your hook).
- Yarn over, insert hook into the same space as the slip stitch, yarn over, pull through, yarn over and pull through 2 loops on the hook (you should have 5 loops on your hook).
- Yarn over and pull through all 5 loops on the hook. 'Puff up' your Pom Pom by pushing it with a finger or thumb from underneath so it resembles a rounded pom pom (or see video).
- Ss into the next stitch to 'anchor' your pom pom.
- Ss into the next stitch.
- Repeat from instruction 3. to 10. until you reach the end of the row. You may have one or two stitches left. Ss in the stitches until you reach the corner.
- ss, ch1 ss into each corner space.
The Pom Border looks brilliant finished and adds such a gorgeous squishy, tactile element to the blanket!
I especially love how the colours change throughout the border with this yarn!

You are welcome to share the pattern, however please acknowledge that the design belongs to Yarn Me Calm respecting my rights as a designer, thank you!
This is one of those rare patterns of mine that hasn't been tested! If you do find any bugs in it please don't hesitate to contact me via email so I can iron them out! I am human so definitely make mistakes!
If you have questions about this pattern, please contact me at
I hope you enjoy the pattern!
Andrea x


