Synergy Throw - By Alison Allen
Andrea Clements
The wonderful Ali Allen (@ali_in_tas on Instagram) has done it again! Ali has created this fabulous hexagonal shaped throw made up of fabulous triangle motifs using some yummy Lion Brand Big Scoop and Scheepjes Colour Crafter yarns.
I was so excited when she first had this concept, unfortunately it was originally designed for the Scheepjes Stone washed & River washed XL packs and they are no longer being produced so this meant a rethink of both the yarn and the design.
Lucky for all of us, Ali was not only happy to do recreate her original design but she was again happy to share her pattern free on The Calming Yarn and here it is!
Thanks Ali you are so fabulously generous and we appreciate you x
One of our other sensational Yarn Me Calm Community Members, Wendy Bambach, tested this gorgeous pattern, thanks Wendy x.
I hope you all love this pattern as much as I do and it would be wonderful if you jumped on over to Ali's Instagram page to show her your appreciation!

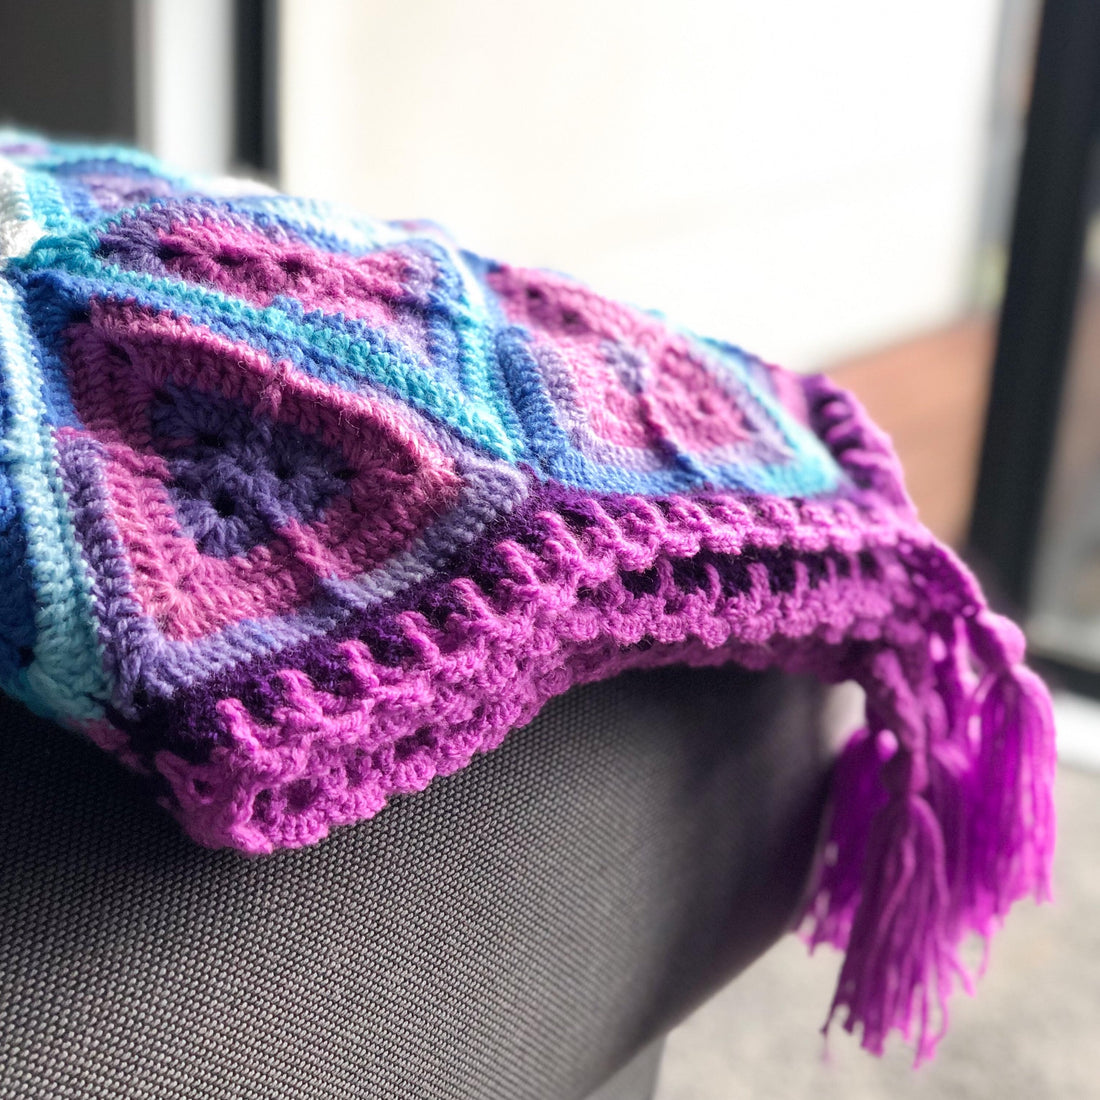
Synergy Throw
A hexagon shaped crochet throw that can be made in two sizes, full size using two balls of Lion Brand Ice Cream Big Scoop, or a smaller version using one ball.
Materials
- Lion Brand Ice Cream Big Scoop - 1 ball for small size, 2 balls for full size
- Scheepjes Colour Crafter - 1 ball each of two contrasting colours.
- 4mm Hook
- Scissors
- Wool needle for joining
UK terms
tr = treble,
dtr = double treble,
fptr = front post treble,
ch = chain,
sl st = slip stitch.
Notes:
Work in rounds, joining with a slip stitch into top stitch of starting 2ch. I work 2ch at the start of at round instead of 3 as I think it gives a neater finish.
Leave long tail after completing the final round of each motif as these will be used for joining

Triangle Motif
Using 4mm hook, make 80 triangle motifs for the full size or 42 for the small size.
1) Ch 4 and join with a sl st
2) Ch 2, 2tr, 2ch, 3tr, 2ch, 3tr, 2ch join with sl st (3 clusters of 3 stitches and 3 x 2ch spaces)
3) Ch 2, 1fptr, 1 tr, *in 2ch space work corner (3tr, 2ch, 3tr) then 1tr, 1fptr, 1 tr* Repeat * once and then work corner (3tr, 2ch, 3tr) and join with sl st (27 stitches plus 3 x 2 ch spaces)
4) Ch 2, *1fptr, 1 tr in next 4 stitches, work corner (2tr, 1dtr, 2ch, 1dtr, 2tr), 1tr in next 4 stitches*, repeat twice with the second repeat ending with 1tr in 3 stitches and join with sl st (45 stitches plus 3 x 2ch spaces).
5) Ch 2, *1fptr, 1 tr in next 7 stitches, work corner (2tr, 1dtr, 2ch, 1dtr, 2tr), 1tr in next 7 stitches*, repeat twice with the second repeat ending with 1tr in 6 stitches and join with sl st (65 stitches plus 3 x 2ch spaces).
6) Ch 2, *1fptr, 1 tr in next 10 stitches, work corner (2tr, 1dtr, 2ch, 1dtr, 2tr), 1tr in next 10 stitches*, repeat twice with the second repeat ending with 1tr in 9 stitches and join with sl st (85 stitches plus 3 x 2ch spaces).
Leave long tail (around 25-30cm) for joining and weave in starting tail only.

Assembly
To assemble, sort motifs into groups based on the colour they feature most heavily, for the colour-way used for pattern photos this meant sorting into; mostly white, mostly blue, mix of most colours, mostly magenta.
Lay out your motifs in a hexagon shape as per diagram below. Unshaded section shows layout of small size (single ball), include shaded motifs for layout of full size (two ball).

Start with lighter coloured motifs at the centre, working out to darkest. Move motifs around until you are happy with the layout, aiming for a balanced appearance overall
When you are happy with the layout, sew the motifs together using your preferred sewing method. Pattern photos were whip stitched through front loop only.
Border
Using complementary colour 1, join in the 2 ch space of the left motif at any corner (see arrow in picture below).

1) Work 1 dc in each stitch and 2 ch corner space around, when you reach each corner work 1dc in the corner 2 ch space of the first motif, chain 2, then work 1 dc into the corner 2 ch space of the second motif. Picture below right shows dc worked into 2 chain spaces where three motifs join. Slip stitch to join end of round.
2) Work 1 dc in each dc around, in 2ch space at each corner work 1 dc, 1 ch, 1 dc. Slip stitch to join end of round.
3) Repeat row 2
4) Using a standing stitch so no chain required, 1 tr, (5ch, skip three stitches, 1tr), repeat around ensuring you work (1tr, 5ch, 1tr) into the chain space from row 3 at each corner - you may need to skip an extra stitch in the repeat closest to the corners to do this which won’t affect the look, just ensure both sides of the corner match. Join last 5 ch to first tr with a slip stitch and fasten off.
5) Join Complementary colour 2 in any corner 5ch space. Ch 2, 4 tr, 1 dtr, 3ch, 1dtr, 5tr in 5ch space. (1dc in tr, {dtr, 2ch, dtr} over 5 ch from round 4 into middle skipped dc from row 3) around, ensuring corners are worked as (5 tr, 1 dtr, 3ch, 1dtr, 5tr in 5ch space). Join with slip stitch into top of ch 2.
6) 1dc into each stitch around, working 2dc, 1ch, 2dc into 3ch spaces at corners. Join with slip stitch at end of round. Fasten off.

Optional:
Add tassels in complementary colour two, joining into the ch space at the point of each corner.

You are welcome to share the pattern, however please acknowledge that the design belongs to Ali Allen respecting her rights as a designer, thank you!
If you have questions about this pattern, please contact me at
Andrea x